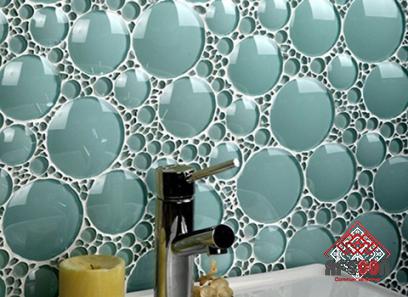
A Creative Solution for Stunning Flooring In the world of interior design, glaze tile flooring has become a prominent choice for both commercial and residential spaces. The allure lies in the rich colors, glossy finish, and durability it offers. While hiring professionals to install glaze tile can be costly, undertaking a DIY project can be a rewarding and cost-effective alternative. In this article, we will explore the process of glaze tile DIY, providing you with valuable tips to successfully tackle this project. Step 1: Gather Your Tools and Materials Before embarking on your glaze tile DIY adventure, it is crucial to have all the necessary tools and materials at hand.
.
 Typically, you will need glaze tiles, tile adhesive, a trowel, a tile cutter, a grout float, grout, a sponge, a sealant, and safety equipment such as gloves and goggles. Ensure the quality of your tiles and adhesive by purchasing them from reputable suppliers. Step 2: Prepare Your Surface Preparation is key to achieving a flawless glaze tile installation. Begin by ensuring that your surface is clean, dry, and free of any residue or imperfections. Remove old flooring or carpeting and level the floor to ensure an even surface. Smooth out any rough patches, and fill in any cracks or holes with appropriate patching material. Step 3: Measure and Cut Tiles Accurate measurements are paramount. Plan your tile layout and ensure that your measurements are precise to avoid unnecessary mistakes and material wastage.
..
 Use a tile cutter to carefully cut tiles to fit edges, corners, or irregular spaces. Double-check your measurements before making any cuts to avoid costly errors. Step 4: Apply Adhesive and Lay the Tiles Following the manufacturer’s instructions, apply a sufficient amount of tile adhesive to the prepared surface using a trowel. Ensure an even distribution of adhesive to provide proper bonding. Lay each tile carefully, starting from one corner and working your way across the room. Use spacers to achieve even spacing between each tile for a professional finish. Allow the adhesive to dry according to the manufacturer’s guidelines. Step 5: Grouting and Sealing Once the adhesive has fully dried, it is time to apply grout.
…
 Choose a grout color that complements your tiles and apply it using a grout float. Fill in the gaps between the tiles, ensuring that the grout is evenly distributed. Use a damp sponge to remove any excess grout, taking care not to remove grout from the gaps. Allow the grout to cure for the recommended time. To protect your glaze tiles from stains and maintain their luster, seal them with an appropriate sealant. Follow the instructions provided by the sealant manufacturer, ensuring that your tiles are thoroughly protected. Step 6: Finishing Touches Finally, clean the entire tiled area using a mild cleaner and a mop or sponge. Make sure to remove any grout haze that may have remained on the tiles. Stand back and admire your beautifully installed glaze tile DIY flooring, a testament to your creativity and hard work. While glaze tile DIY can be a challenging and time-consuming project, the satisfaction of completing it successfully is unparalleled. By following these steps and taking your time, you can achieve stunning results. Remember to prioritize safety, use appropriate tools and materials, and consult professional advice when needed. Happy tiling!


Your comment submitted.